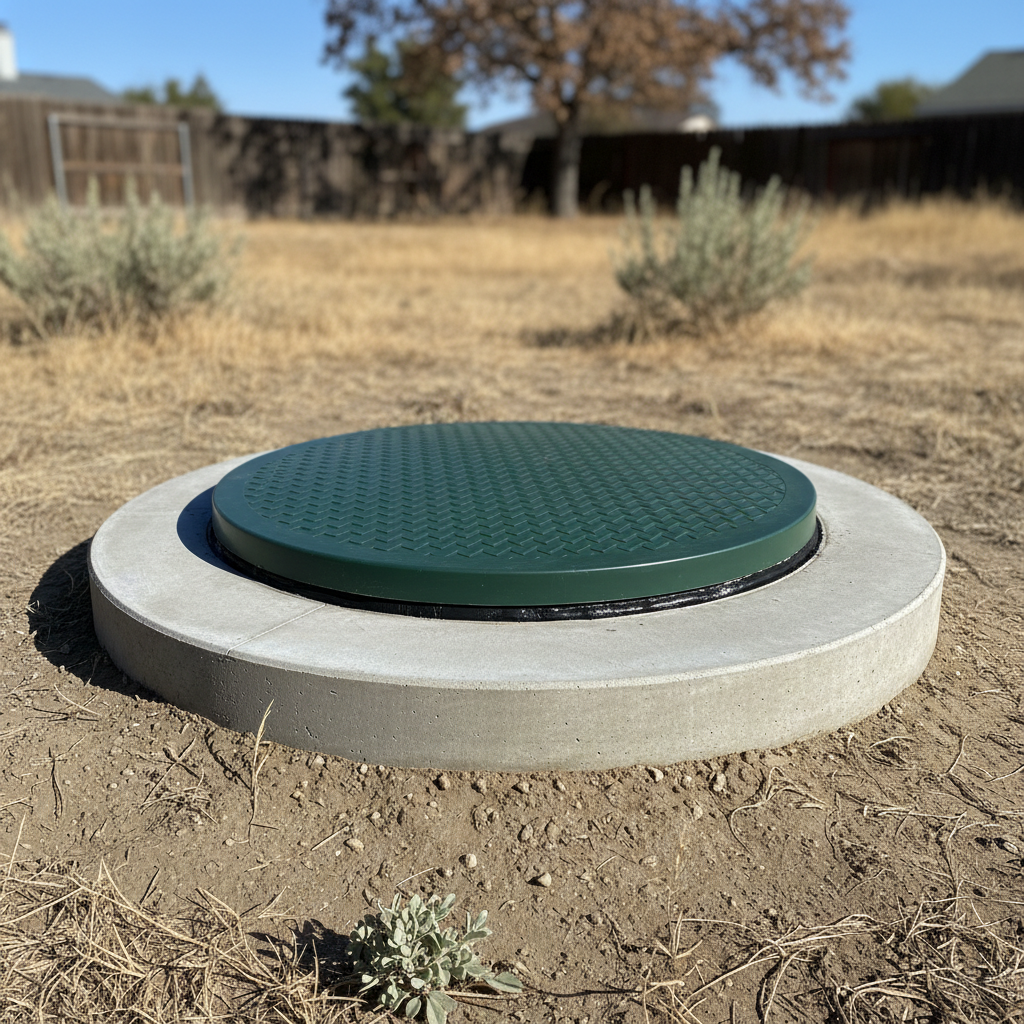
Look, if you've got a septic system here in Fresno, you already know the drill. Every few years – or maybe more often if you're really on top of things – that tank needs pumping. And if your access lids are buried, well, that means someone's gotta get out there with a shovel, digging up your yard. It's a pain, it messes up your landscaping, and honestly, it just costs you extra money every single time. That's exactly where septic risers come in.
A septic riser is basically a tough pipe, usually plastic, sometimes concrete, that brings your septic tank's access opening from way underground right up to ground level. Think of it like a manhole cover for your septic system. It makes getting to your tank for inspections, pumping, or repairs super easy. No more digging, no more guessing where those lids are, especially in our hard Fresno clay after a long, dry summer.
I won't lie, putting in a riser isn't quite as simple as changing a lightbulb. But it's certainly not rocket science either. For a lot of homeowners, especially those who don't mind a little DIY, it's a totally doable project. It saves you money down the road, keeps your landscaping looking good, and makes future maintenance visits quicker and way less disruptive.
Before You Grab That Shovel
First things first, you need to know what you're actually working with. You can't just slap a riser on any old tank, right? Here's what you'll need to figure out:
- Find Your Tank: If you don't already know exactly where your septic tank is, that's step one. Check your property's 'as-built' plans or old inspection reports. No luck there? Look for clues in your yard like slight dips or unusually green patches of grass. Sometimes, the main sewer line leaving your house can give you a good idea of the tank's general direction – it's usually 10 to 25 feet from the house, rarely closer than 3 feet. A metal probe can help you find the tank's edges.
- Measure the Depth: Once you've found the access point, you need to know how deep it's buried. Septic tank lids can be anywhere from just a few inches to several feet down. Most residential tanks have lids buried about a foot deep, but I've definitely seen them much deeper, especially on older properties around Fresno. You'll want the top of your riser to sit flush with the ground, or maybe just an inch or two above it, to keep your lawnmower from damaging it.
- Measure the Opening: Septic tank openings aren't all the same size. Most common residential tanks have round openings, usually 20 or 24 inches across. Older tanks, particularly concrete ones, might have square or rectangular openings, which will need a special adapter ring to fit a round riser.
- Choose Your Riser Kit: Most risers are made of tough plastic (polyethylene or PVC) and come in kits that include the riser sections, an adapter ring (if you need one), a lid, and sealant. Plastic risers are light, affordable, and easier for DIY installation. Concrete risers are super durable but heavy, so they usually need professional help. Make sure your kit has a secure, lockable lid and a safety screen – that's really important for preventing accidents.
- Call 811: Seriously, before you dig even one shovel-full, call 811. It's free, and they'll mark any underground utility lines. Hitting a power line or gas pipe is way, way worse than a buried septic lid.
The Installation Day: DIY vs. Pro
Alright, you've got your kit, you know where to dig, and you've called 811. Here's how the installation generally goes:
What You Can Realistically DIY
If you're pretty handy and your tank isn't buried too deep, you can absolutely tackle this yourself. Most riser kits are designed with DIYers in mind.
- Dig It Out: Carefully dig around your existing septic tank lid until the entire top of the tank is exposed and clean. You're aiming for about a 32x32 inch clear area around the opening.
- Clean the Surface: Sweep away any dirt or debris from the tank's surface where the riser will sit. Check for cracks while you're at it.
- Install the Adapter Ring (if needed): If your tank opening is square or an odd size, you'll put an adapter ring on first. Apply butyl rope sealant to the bottom of the adapter ring to create a watertight seal. Place the adapter ring on the tank opening, making sure it's centered and level. You'll likely need to drill holes into the concrete and secure it with anchor bolts, tightening them until snug.
- Stack the Risers: Apply butyl rope sealant between each riser section as you stack them to get the right height. Many risers snap or screw together. Make sure the stack is level and secure.
- Secure the Lid: Attach the riser lid using the screws or bolts that came with it. Make sure it's a tight, secure fit to keep out debris, odors, and prevent accidental access.
- Backfill: Gently backfill the soil around the riser, compacting it gradually. Be careful not to put too much pressure on the riser walls.
Remember, safety is a huge deal here. Septic tanks contain hazardous gases. Never work alone, and never, ever enter the tank. Keep kids and pets far away from the open tank.
When to Call Horizon Septic Solutions (The Pros)
While DIY is totally doable, there are definitely times you should give us a call. This isn't just about convenience; it's about staying safe and making sure the job gets done right.
- Deeply Buried Tanks: If your tank is buried more than 18-24 inches, or if you've got an older concrete lid that's heavy and tough to remove, it's best to let us handle the heavy lifting and specialized equipment.
- Damaged Tank Opening: If the concrete around your tank's opening is cracked or crumbling, getting a watertight seal will be really tricky. We've got the know-how to fix this properly before putting in the riser.
- Uncertainty: If you're unsure about any part of the process, or if you run into unexpected problems like a high water table or some weird tank construction, don't just guess. A botched installation can lead to leaks, contamination, and expensive repairs later on.
- Permitting: Some areas in and around Fresno might actually require permits for septic system changes. We're familiar with local rules and can make sure everything is up to code.
Professional installation usually costs between $300-$500 per access point, and that includes the riser. When you think about the long-term savings on digging fees (which can be $50-$200 per service call) and the sheer peace of mind, it's often a really smart investment.
After the Riser is Installed
Once your riser is in, maintenance gets a whole lot easier. You'll still need those regular inspections and pumping, but now it's a quick, clean process.
- Regular Checks: Every now and then, check the riser lid to make sure it's still securely fastened and hasn't been damaged. If you spot any cracks or leaks in the riser itself, deal with them fast.
- Landscaping: You can landscape around the riser, but be careful not to plant deep-rooted trees or shrubs too close. If the lid is flush with the ground, watch out with lawnmowers so you don't damage it.
- Enjoy the Convenience: Seriously, you'll wonder why you didn't do this sooner. When our Horizon Septic Solutions crew shows up, we can get right to work, saving you time and money.
Putting in a septic riser is one of those home improvements that truly pays for itself, not just in dollars, but in convenience and, let's be honest, peace of mind. It's a smart move for any Fresno homeowner with a septic system.